
WP Business Intelligence Documentation
-
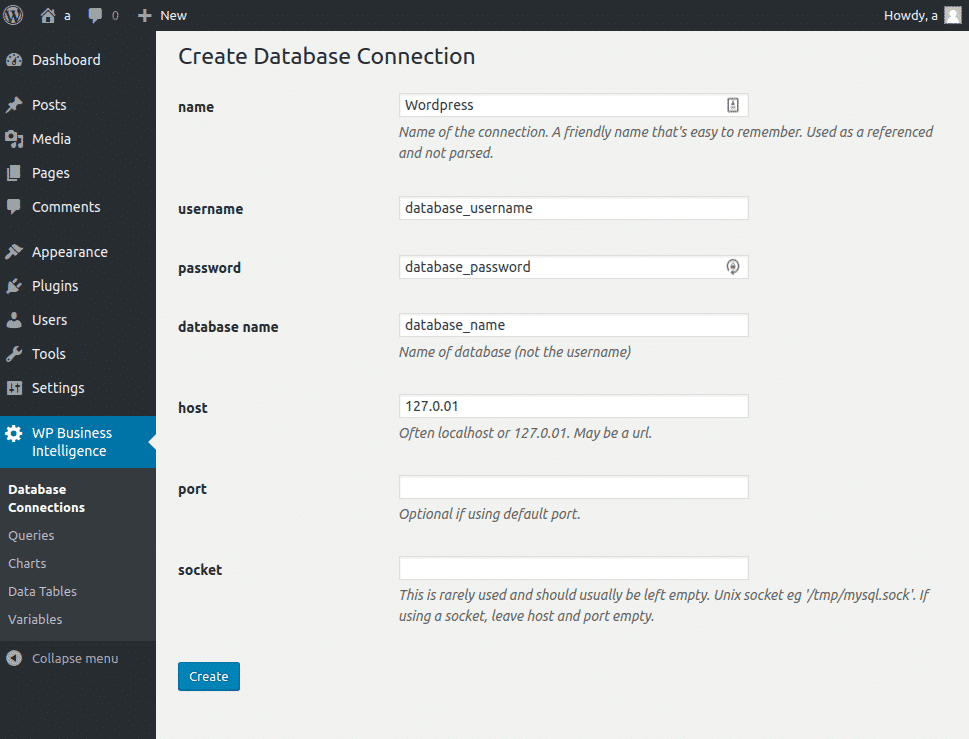
Connect to your database.
-Navigate to the plugin WP Business Intelligence>Database Connections. Click “Add New”.
-Fill out the form then “Create”.
 />
/> -
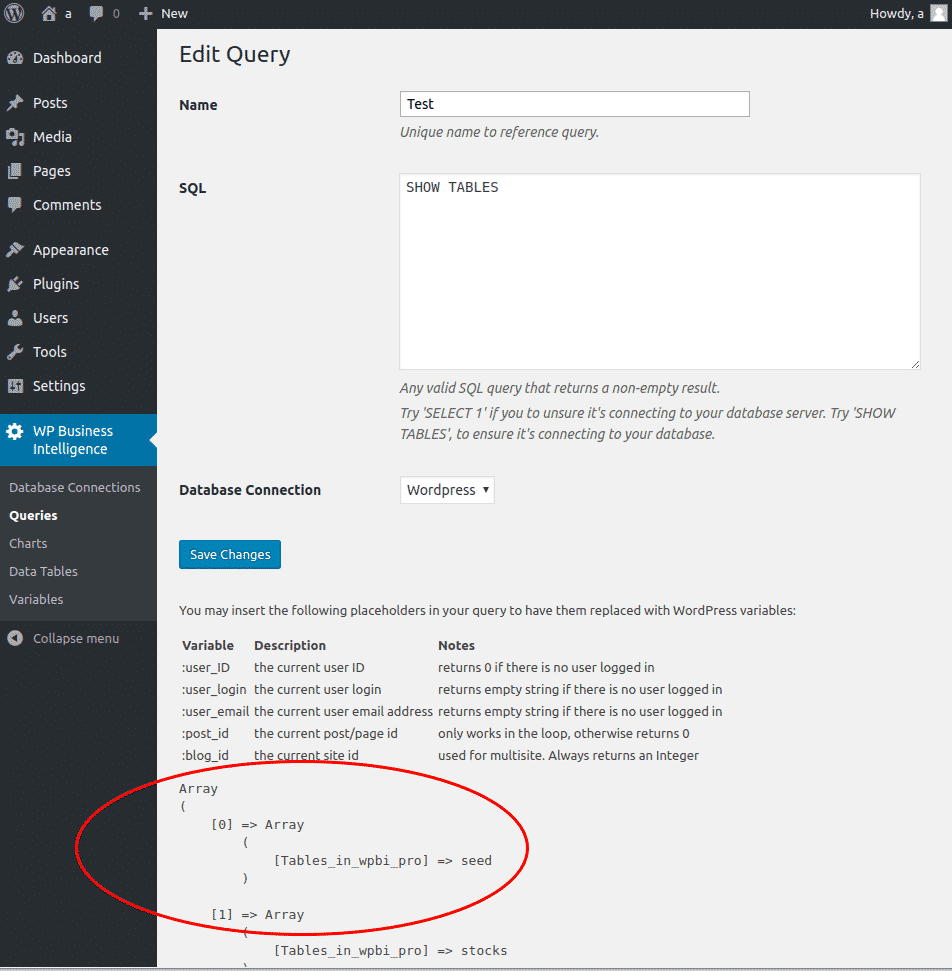
Make an appropriate query.
-Navigate to the plugin WP Business Intelligence>Queries. Click “Add New”.
-Fill out the form then “Create”. Your returned results will appear at the bottom of the page. A good way to test your database connection is to query “SHOW TABLES” and then all of your table names should appear at the bottom of the screen(as highlighted in the red circle). There are many ways to customize your data based on your MySQL query. Please look-up some tutorials if you are not familiar with writing queries to a database.
-
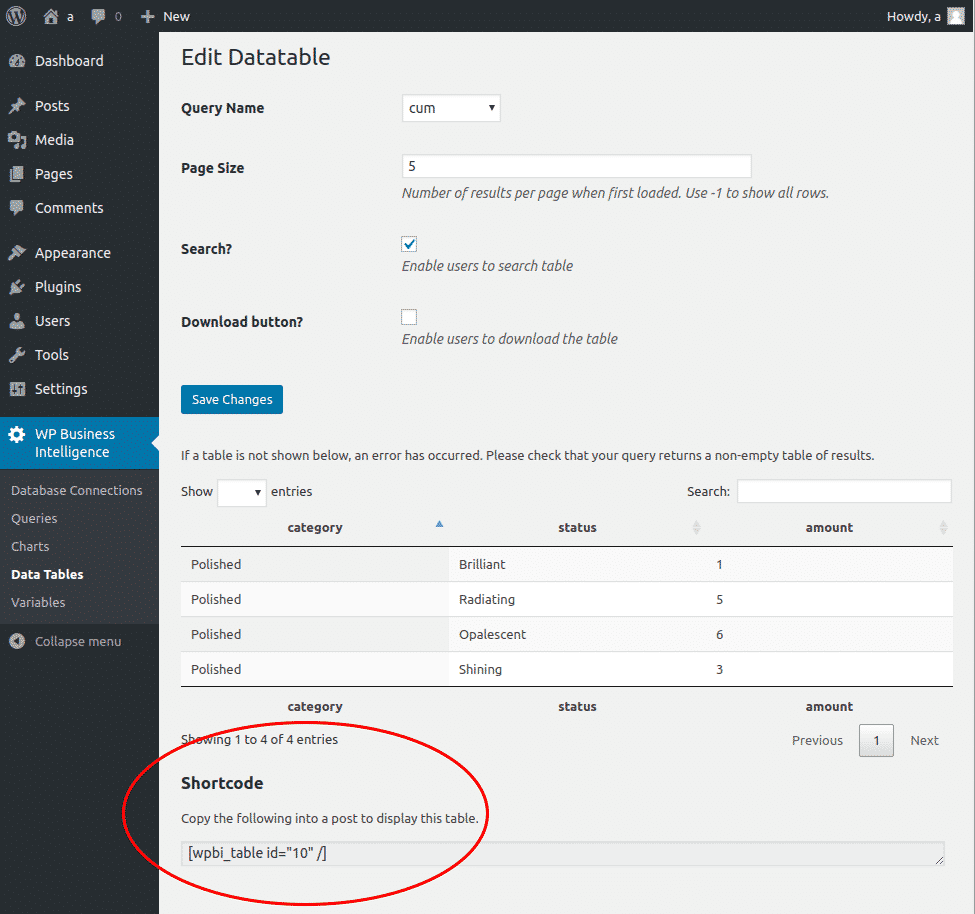
Create the data table.
-Navigate to the plugin WP Business Intelligence>Data Tables. Click “Add New”.
-Fill out the form then “Create”.
-Your example table will appear at the bottom of the page. You can copy the shortcode that is below your example table (highlighted in the red circle) to paste the table into a page or post.
-
Connect to your database.
-Navigate to the plugin WP Business Intelligence>Database Connections. Click “Add New”.
-Fill out the form then “Create”.
/> -
Create an appropriate query.
-Navigate to the plugin WP Business Intelligence>Queries. Click “Add New”.
-Fill out the form then “Create”.
-Your returned results will appear at the bottom of the page. A good way to test your database connection is to query “SHOW TABLES” and then all of your table names should appear at the bottom of the screen(as highlighted in the red circle). There are many ways to customize your data based on your MySQL query. Please look-up some tutorials if you are not familiar with writing queries to a database.
-
Create the chart.
-Navigate to the plugin WP Business Intelligence>Charts. Click “Add New”.
-Select chart type from the drop down menu. Click “Create”.
-Fill out the form then “Create”. You will need assign columns to the different axis of your charts from the drop down menu. Then click “Save Changes”
-You can copy the shortcode that is below your example chart (highlighted in the red circle) to paste the table into a page or post.

-
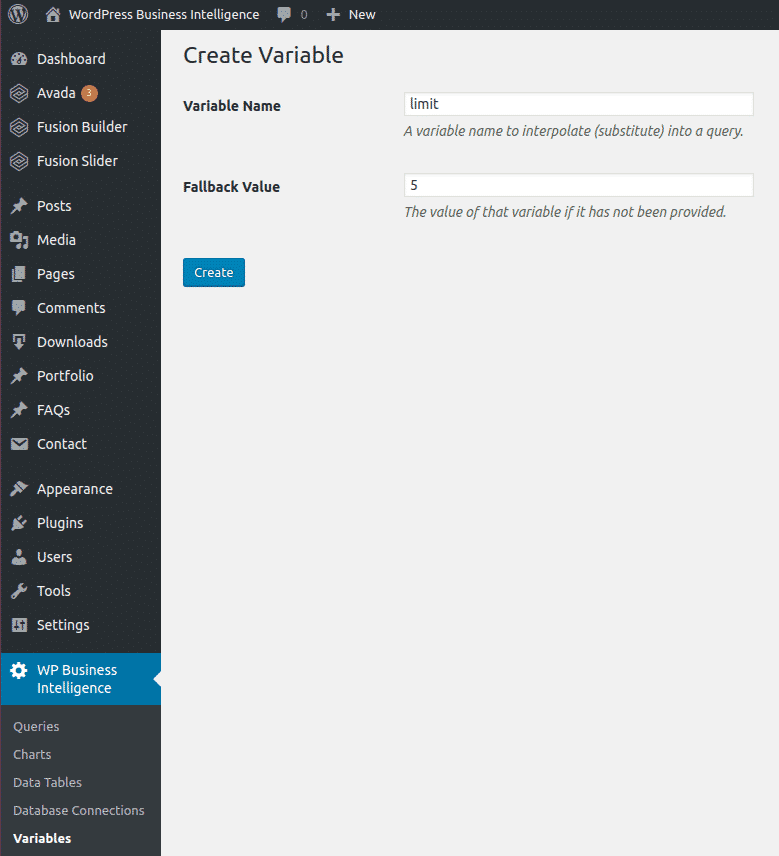
Create new variables
-Navigate to the plugin WP Business Intelligence>Variables. Click “Add New”.
-Fill out the form then “Create”.
-
Pass the created variable into a query.
-Navigate to the plugin WP Business Intelligence>Queries. Click “Add New”.
-Fill out the form then “Create”.
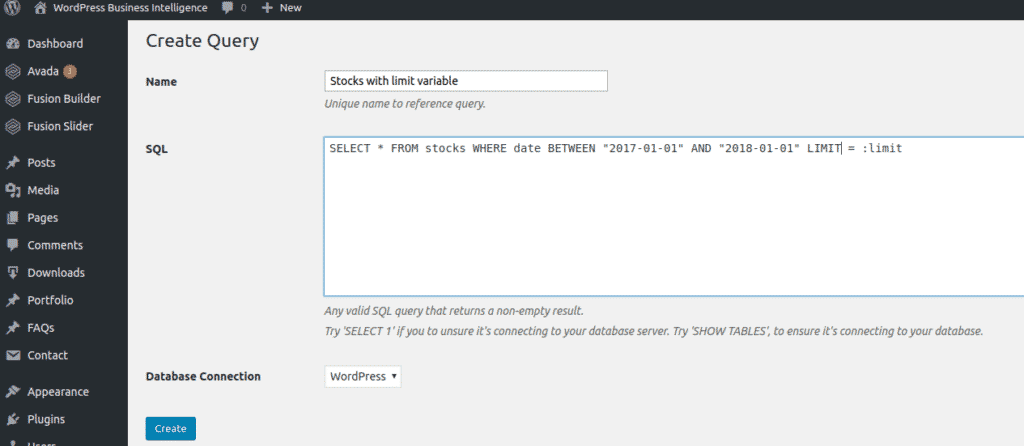
- Now requests to yoursite.com/path-to-your-chart?limit=10 will return 10 results. Requests to yoursite.com/path-to-your-chart, will return 5 results.
- Find the versions of the operating system that PHP is running on, the PHP version and the Microsoft SQL Server version.
- Consult the support matrix to find out which version Microsoft PHP Drivers you need. For example if you have PHP 7.2, and SQL Server 2017, then you’ll need Microsoft PHP Drivers version 5.3.
- Download and install the Microsoft PHP Drivers on the PHP server. There are guides for some OSs at the bottom of this page that can guide you through the installation of the latest versions.
- Enable the PHP extensions: pdo_sqlsrv and sqlsrv.
If you have done everything correctly you can run the command “php -m” to show which module are installed. If it’s working, you should see that sqlsrv and pdo_sqlsrv are included in the output.
WP Business Intelligence F.A.Q.
- Once you purchase the Pro version of the plugin you will receive an email with the zipped plugin files.
- Upload the uncompressed folder
wp-business-intelligence-liteto the/wp-content/plugins/directory. - Activate the plugin through the ‘Plugins’ menu in WordPress.
WPBI is very robustly tested. It’s tested to run on the following
- PHP 5.6 and up
- WordPress 4.4.0 and up
- MySQL 5.5 and up including 8.0
- MariaDB 5.5 and up including 10.x
- It works with any version of Microsoft SQL Server that PHP can connect with using the official Microsoft PHP Drivers. See their compatibility matrix for more information, but it should works all the way back to SQL server 2008.
- localhost
- 10.0.0.0/8
- 172.16.0.0/12
- 192.168.0.0/16
- *.dev
- .*local
- dev.*
- staging.*